
Ever thought your Minecraft world could look like a movie? Many players stick with the default look. But you can change that.
By learning how to add shaders to minecraft, you can make your world come alive. It will have bright colors, moving lights, and real water reflections. This transformative process makes your game look amazing.
Our minecraft shader tutorial is for everyone. You don’t need to know how to code to get great graphics. Follow this guide to make your Minecraft look amazing today.
Key Takeaways
- Discover the simple steps to enhance your game’s visual fidelity.
- Learn how lighting and shadows create a more immersive atmosphere.
- Understand the basics of graphical modification without complex coding.
- Achieve stunning, realistic landscapes with minimal effort.
- Master the installation process to enjoy a premium gaming experience.
Understanding the Impact of Shaders on Minecraft Graphics
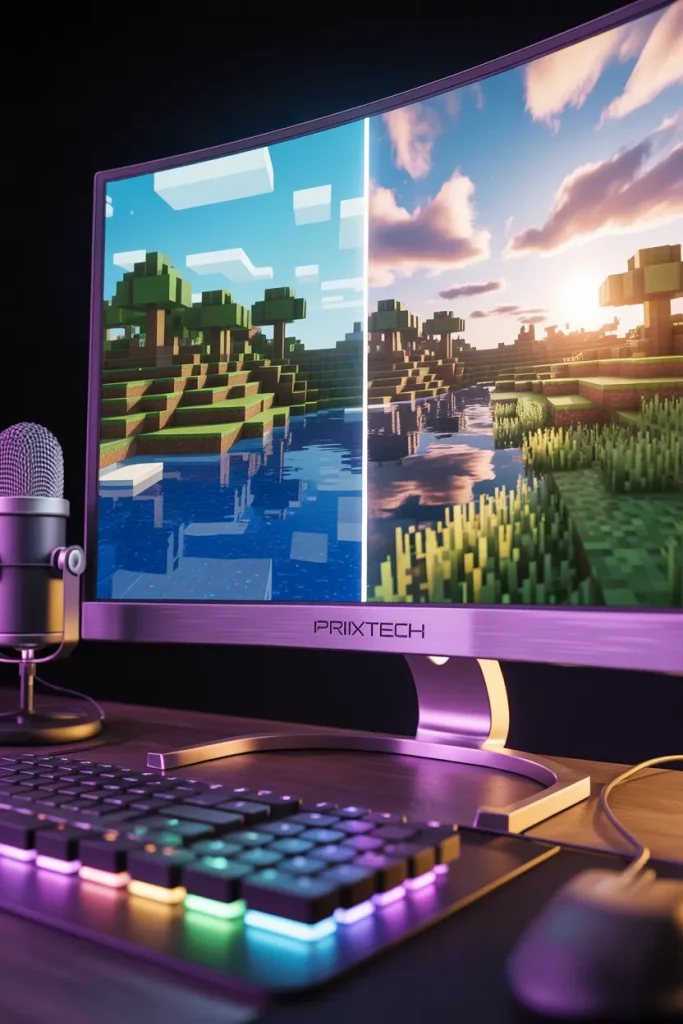
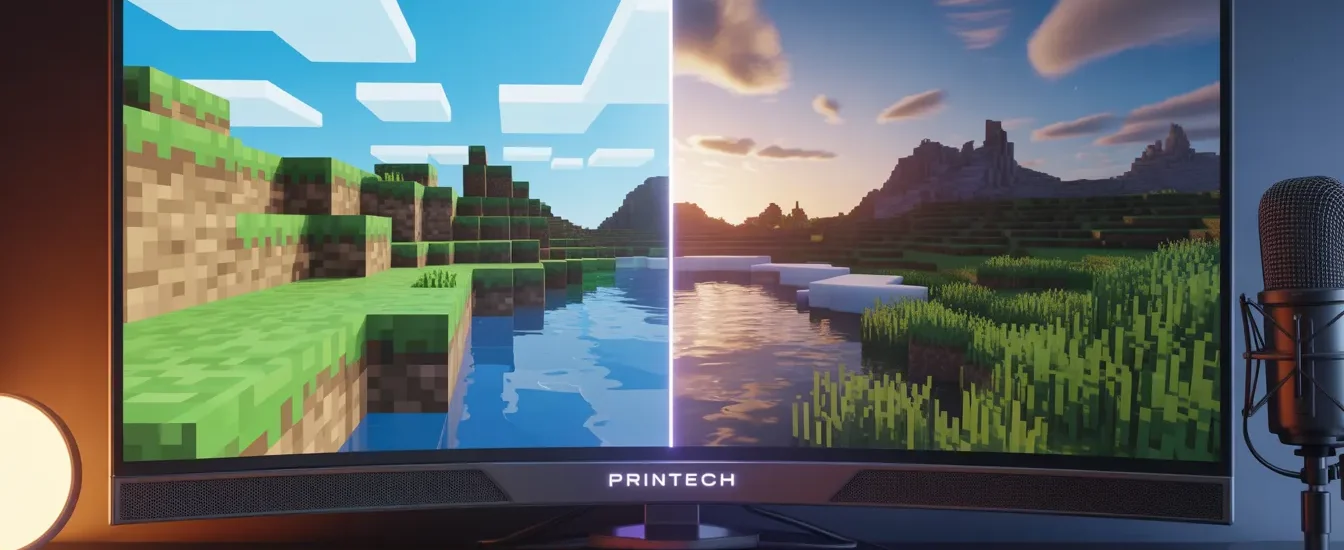
Choosing to enhance graphics minecraft shaders brings a new level of visual depth. Minecraft’s standard engine is simple but lacks the complexity of modern games. Custom packs replace this with a system that handles light and shadow in real-time.
This change brings dynamic lighting that changes with your actions. Sunlight filters through leaves, casting realistic shadows. Water surfaces become reflective, showing the sky and terrain.
“The beauty of Minecraft lies in its simplicity, but the magic of shaders lies in the way they breathe life into every single block.”
Shaders also add atmospheric effects like fog and moving foliage. These features make your world feel real and alive. As you enhance graphics minecraft shaders, the game’s look is only limited by your hardware and taste.
Essential Prerequisites Before You Begin
Getting ready to install shaders Minecraft is key for a smooth experience. Make sure your computer is ready for the extra work. Skipping these steps can cause crashes or slow gameplay.
Installing Java Runtime Environment
Minecraft uses Java, so you need the right version. Most modding tools, like those for installing shaders Minecraft, require Java 8 or newer. An outdated version can stop the game from working or show error messages.
Go to the Oracle or Adoptium website to get the latest Java Runtime Environment. Pick the version that fits your computer’s architecture, usually 64-bit. Keeping Java up to date helps with smooth graphics.
Allocating Sufficient RAM to Minecraft
Minecraft’s default memory settings are often too low for fancy visuals. When you install shaders Minecraft, it needs more memory for smooth graphics. Without enough RAM, you might see annoying stutters or slow performance.
To change your memory settings, use the Minecraft Launcher. Go to the “More Options” tab and adjust the JVM arguments. This lets you give more memory to the game. Check the table below for the right amount of RAM for you.
| Shader Quality Level | Recommended RAM | Performance Impact |
|---|---|---|
| Low/Light | 4 GB | Stable for most PCs |
| Medium/Standard | 6 GB | Balanced visuals |
| Ultra/Extreme | 8 GB+ | High hardware demand |
By following these steps, you set up your computer for installing shaders Minecraft smoothly. Good preparation means your computer can handle the graphics without trouble.
How to Add Shaders to Minecraft Using OptiFine
Want to turn your Minecraft world into a work of art? This step by step guide shaders Minecraft will show you how. OptiFine is the top choice for better game performance and amazing visuals. It makes sure your game runs smoothly and looks great.
Downloading and Installing the OptiFine Mod
First, go to the OptiFine website and pick the right version for your Minecraft. It’s crucial to get the exact version to avoid problems. After downloading, run the installer and follow the instructions to add the mod to your launcher.
After installing, open your Minecraft launcher and choose the OptiFine profile. This minecraft shader tutorial gets your game ready for advanced graphics. Make sure the game starts right before adding any files.
Locating the Shader Packs Folder
With OptiFine on, put your shader files in the right place. Go to your Minecraft folder, usually in AppData on Windows. Look for a “shaderpacks” folder.
If you can’t find it, make a new folder called “shaderpacks.” Drag your shader zip files into this folder without unzipping them. This step by step guide shaders Minecraft lets your game find and use your new graphics when you open video settings.
| Action | Requirement | Common Error |
|---|---|---|
| Download | Match game version | Wrong version mismatch |
| Installation | Run as administrator | File permission denied |
| Folder Setup | Exact folder name | Typo in folder name |
| File Format | Keep as .zip | Extracting the files |
This minecraft shader tutorial helps you manage your graphics mods easily. By keeping things organized, you can switch between different looks for your world or builds.
Iris Shaders: A Modern Alternative for Performance

You can get amazing visuals without losing game speed. Iris is a top choice for those who want to upgrade their Minecraft experience. It brings beauty without slowing down your gameplay.
Why Iris is Gaining Popularity
Iris is known for its exceptional efficiency. It’s made to work well with today’s graphics, unlike older methods that slow down games. You’ll see a smoother game, even in detailed areas.
It’s also easy to turn effects on and off. This lets you keep a high frame rate during fast action. It’s a big change for those who hate slow visuals.
Compatibility with Sodium and Lithium
Iris works great with Sodium and Lithium, tools that boost game performance. Together, they create a powerful team. This trio is the top choice for those who want fast and beautiful gameplay.
Sodium handles rendering chunks, and Lithium optimizes game logic. Iris adds stunning visuals to this mix. This combination is perfect for those who want the best of both worlds.
For top-notch performance, try this combo. It makes sure your hardware is used well. You get great lighting and shadows without losing speed. These shader mods for minecraft are key for modern gaming.
Review of BSL Shaders: The Gold Standard for Realism
BSL Shaders are known as one of the best shaders for minecraft. They have an amazing lighting engine. This makes every block feel alive and immersive.
Overview
These shaders are famous for their balance of high-end looks and a clean, polished style. As a top choice for top shaders for minecraft, they suit many playstyles. You can enjoy survival building or cinematic exploration.
Pros
The main benefit of using this pack is the exceptional lighting quality. You’ll see realistic shadows and bright colors. The pack also works well on many hardware setups.
Cons
While these shaders look amazing, they can be hard on your system. Players with older graphics cards might see slower frame rates. It’s key to watch your system’s performance during intense play.
Features
The pack offers many advanced graphics settings. You can customize your experience with:
- Customizable bloom for glowing light sources.
- Depth-of-field effects for a cinematic feel.
- Dynamic weather and water reflections that look very realistic.
Recommendations
If you want a balanced look that enhances your world, this is a great pick. It’s perfect for players who love taking screenshots or recording gameplay. Make sure your drivers are up to date for the best experience with these top shaders for minecraft.
Review of Complementary Shaders: Balancing Beauty and Speed
Complementary Shaders are perfect for those who want a beautiful game without losing speed. They offer a balance between stunning visuals and smooth gameplay. Many see them as the best shaders for minecraft because they work well on mid-range computers.
Overview
These shaders aim to enhance the vanilla Minecraft look without changing it too much. They make the game world feel more alive by improving light interactions with blocks. Even in dense areas, the game stays smooth and responsive.
Pros
The main benefit is their incredible optimization. They let players with average graphics cards enjoy advanced lighting without lag. The menu is also easy to use, helping you adjust settings for your hardware.
Cons
While they’re among the top shaders for minecraft, they might not be enough for those seeking extreme realism. If you want ultra-realistic textures that test your GPU, you might find the default settings too basic.
Features
This pack offers several key features to enhance your experience. You’ll see optimized water rendering and realistic cloud movement. The lighting engine also creates precise shadows, making caves and interiors feel right.
Recommendations
We recommend starting with the “High” profile settings. If you notice drops in frame rate, try disabling advanced shadow quality or reducing volumetric lighting distance. Keeping your drivers updated will also help shaders run smoothly.
| Feature | Performance Impact | Visual Quality |
|---|---|---|
| Water Reflections | Low | High |
| Volumetric Clouds | Medium | High |
| Dynamic Shadows | High | Ultra |
| Ambient Occlusion | Low | Medium |
Review of SEUS Renewed: The Classic Cinematic Experience
When you search for the best shaders for minecraft, SEUS Renewed is often at the top. It changed how we see Minecraft. It brings a moody feel to the game, making it feel like a movie.
This shader pack focuses on artistic lighting and deep shadows. It’s perfect for those who want realistic light and soft colors. It’s a top choice for those who love visual stories.
Overview
SEUS Renewed is an updated version of Sonic Ether’s Unbelievable Shaders. It offers high visual quality while staying true to Minecraft. It uses realistic colors, not bright ones.
Pros
The pack’s lighting engine is amazing. It makes sunsets and sunrises look like movie scenes. The water reflections are also very clear, adding to the game’s feel.
Cons
This pack is demanding on your computer. It might slow down if your graphics card isn’t strong. It also doesn’t have as many customization options as newer packs.
Features
This pack has advanced lighting that changes with the day. It also has realistic clouds and soft shadows. The weather, like rain, looks much better than the default game.
Recommendations
Use this pack if you have a good computer and want a high-quality look. It’s great for building, photography, or exploring with a movie-like feel. Here’s a table to help you decide if it’s right for you.
| Feature | SEUS Renewed | Performance Impact |
|---|---|---|
| Lighting Quality | High | Moderate |
| Water Effects | Realistic | Low |
| Hardware Demand | High | High |
| Visual Style | Cinematic | N/A |
Review of Sildur’s Vibrant Shaders: Customization at Its Best

Looking for the best shader packs for minecraft? Sildur’s is a top choice. It’s known for its flexibility and stunning visuals, fitting almost any setup.
Overview
Sildur’s Vibrant Shaders enhance your Minecraft world. They offer everything from small lighting tweaks to full visual overhauls. It’s easy to use but also has deep settings for graphics enthusiasts.
Pros
This pack is incredibly versatile. It comes in versions from Lite to Extreme, ensuring smooth gameplay on any system. The lighting engine is top-notch, with realistic reflections and colors that make every area stand out.
Cons
Customization can be a lot for beginners. Finding the right settings takes time. Also, the Extreme versions need a lot of GPU power, which can slow down older machines.
Features
This pack has cool features like volumetric lighting and dynamic water reflections. You can adjust these in the game menu. The modular nature lets you create a look that’s all your own.
Recommendations
For the top shaders for minecraft, start with Medium or High. This will help you see how your system handles it. Then, try Extreme for the best visuals. Remember to tweak shadow quality and resolution to keep your game running smoothly.
Review of Kappa Shaders: Pushing Hardware to the Limit
Experience the ultimate in graphical realism with Kappa Shaders. They are among the most demanding shader packs for minecraft today. Designed for those who want top-notch visuals and have the hardware to match.
Overview
This pack turns your Minecraft world into a cinematic wonder. It uses advanced ray-tracing capabilities and physically based rendering. This makes your world feel incredibly real.
Pros
The main benefit is its unparalleled visual fidelity. You’ll see realistic water reflections, dynamic shadows, and detailed material textures. Every block comes alive with detail.
Cons
These shaders are among the most demanding top shaders for minecraft. They can slow down your game unless you have a top-notch graphics card and CPU.
Features
Kappa Shaders have advanced lighting engines that mimic real-world light. They also include custom skyboxes and volumetric fog. These add depth to your adventures.
Recommendations
These shaders are best for players with high-end gaming rigs. If you want to see your system’s limits, these are great top shaders for minecraft to try.
| Feature | Performance Impact | Visual Quality |
|---|---|---|
| Ray-Tracing | Very High | Excellent |
| Water Reflections | High | Superior |
| Shadow Resolution | Medium-High | High |
| Material Textures | High | Ultra-Realistic |
Optimizing Your Settings for Maximum Visual Fidelity
Getting the most out of your shaders means tweaking them just right. Default settings are good, but they might not fit your hardware perfectly. This step by step guide shaders minecraft will show you how to balance looks and performance.
Adjusting Shadow Quality and Resolution
Shadows are the biggest challenge for any shader pack. High-res shadows are sharp but can slow down your GPU. Start by lowering the shadow map resolution if you see lag.
Many shaders let you switch to soft shadows or change when shadows appear. Reducing shadow distance keeps your area looking good while improving performance.
Configuring Water and Volumetric Lighting
Water and lighting make Minecraft worlds feel alive. Adjusting water and light settings can make your game more immersive. Proper optimization keeps these features looking great without slowing down your game.
Here are some tips for tweaking your lighting and water:
- Volumetric Lighting: Lower the sample count if you experience lag in foggy or bright areas.
- Water Reflections: Disable high-quality reflections if you are playing on a lower-end graphics card.
- God Rays: Adjust the intensity to prevent the screen from becoming too bright during sunrise or sunset.
By fine-tuning these settings, you can keep your game looking stunning and running smoothly. This step by step guide shaders minecraft helps you tailor your experience to your hardware’s strengths.
Troubleshooting Common Shader Installation Issues
Adding shaders to Minecraft can be rewarding, but sometimes technical issues pop up. Even if you follow a step by step guide shaders Minecraft installation perfectly, problems can arise. These issues are often minor and can be fixed with a few quick system adjustments.
Fixing Black Screen Errors
A black screen when launching the game usually means outdated graphics drivers or an incompatible Java version. First, make sure your GPU drivers are up to date. Updating your drivers often fixes the main issue.
If the problem continues, check if you’re using the right Java version for your Minecraft. Sometimes, a conflict between the shader mod and other mods causes crashes. Try launching the game with only the shader mod to find the problem.
Resolving Texture Glitches and Flickering
Texture flickering or strange visuals usually come from wrong in-game video settings. When you learn how to add shaders to Minecraft, balancing your settings is key. Disabling Fast Render or Anti-Aliasing in the performance menu often fixes flickering.
If you see visual bugs, check a step by step guide shaders Minecraft forum. See if your shader pack needs a different mod loader version. Keeping your shader packs updated ensures they work with the latest game patches. Adjusting your VSync settings can also improve visual stability during intense play.
Hardware Requirements for Ultra-Realistic Shader Packs
Before you start, check your computer’s hardware. High-quality visuals need a lot from your system to run smoothly. Without the right parts, you might see stuttering or big drops in performance.
GPU Recommendations for High-End Shaders
The graphics card is key for advanced shader mods. Look for a dedicated GPU with 6GB to 8GB VRAM. Modern NVIDIA RTX or AMD Radeon RX series cards are top choices.
If your GPU isn’t strong enough, the game will have trouble with shadows and reflections. Getting a good graphics card keeps your game looking great. Make sure your card’s drivers are up to date for the best performance.
CPU Bottlenecks and How to Avoid Them
Your processor handles the game’s logic and loading. If it can’t keep up, your game will slow down, even with a strong GPU. This is common on older systems with heavy shader mods.
To prevent this, get a CPU with a fast single-core clock speed. Adjusting your render distance can also help. Closing other apps while playing frees up resources for your game.
Comparing Shader Packs Based on Your Playstyle
Your playstyle is key to finding the right shader packs for Minecraft. Not all packs are the same. The best one for you depends on what you want to achieve. Whether you love taking photos or enjoy survival, picking the right shader mods for Minecraft is vital.
Best for Cinematic Screenshots
For stunning landscapes or top-notch content, focus on lighting and shadows. These packs use advanced tech for ultra-realistic visuals. You’ll see cool stuff like volumetric fog and realistic water.
These shader packs for Minecraft are great for photos and videos. They might slow down your game, but the visuals are worth it. They make Minecraft look and feel like a real world.
Best for Survival Gameplay and Performance
If you’re into building or exploring, you need packs that keep your game smooth. Look for shader mods for Minecraft that improve visuals without slowing you down. These packs enhance lighting and water textures.
Opt for packs that balance looks and speed. This way, you can play for hours without lag. It’s all about finding the right mix of beauty and performance.
| Shader Pack | Visual Quality | Performance Impact | Best Use Case |
|---|---|---|---|
| Kappa | Extreme | Very High | Cinematic Screenshots |
| BSL | High | Moderate | General Gameplay |
| Complementary | High | Low | Survival & Performance |
| Sildur’s Lite | Medium | Very Low | Low-End Hardware |
Conclusion
Your journey to a stunning blocky world begins with the right tools. This tutorial gives you the basics to turn your world into a masterpiece of light and shadow.
You now know how to make your graphics pop with the right shaders. Whether you like the cinematic look of SEUS Renewed or the speed of Iris, your game will look amazing.
Explore the many community-made packs available today. Even small tweaks can make a big difference in your survival sessions.
Make sure your graphics drivers are up to date for the best performance. Share your stunning screenshots to inspire others on their creative journeys.
Your feedback helps others find the best ways to optimize their setups. Dive into your next adventure with confidence and enjoy the vibrant, realistic atmosphere you’ve created.
FAQ
What is the first step if I want to learn how to add shaders to minecraft?
Start by setting up your environment. Make sure you have Java 8 or higher installed. Then, use a tutorial to install OptiFine or Iris Shaders. These are needed to run shader packs.
How can I properly install shaders minecraft without the game crashing?
To avoid crashes, give the Minecraft launcher enough RAM. Top shaders like Kappa or SEUS Renewed need more memory than default settings. Also, keep your GPU drivers updated for a smooth install.
What are the best shaders for minecraft if I have a mid-range computer?
For better graphics without slowing down your game, try Complementary Shaders or Sildur’s Vibrant Shaders. The Lite or Medium versions are great. They balance beautiful water reflections with fast performance.
Is there a step by step guide shaders minecraft players should follow for the highest performance?
Yes, many now prefer Iris Shaders over OptiFine. Iris with Sodium and Lithium gives high frame rates. This combo is the best for running shader mods on modern hardware.
Why do BSL Shaders remain the gold standard for many players?
BSL Shaders are loved for their customizable and realistic lighting. They offer volumetric lighting, bloom, and realistic shadows. They’re perfect for a professional, cinematic look.
What should I do if I encounter a black screen or flickering textures?
First, check for mod conflicts. A black screen might be due to outdated OptiFine or driver issues. Always place .zip files directly in the “shaderpacks” folder to avoid errors.
Can I customize how the water and shadows look in my game?
Yes, you can. Most shader mods, like Sildur’s Vibrant Shaders, have detailed settings menus. You can adjust shadow and water settings to match your style and hardware.